Tech Tip #1 - Why You Should Inspect Your Oil Filter
Looking inside your oil filter can give you a quick snapshot of the internal condition of your engine. Ideally, the filter should contain nothing but oil. If you cut your filter open and see metal particles, it's time to tear the motor down and look for the problem.
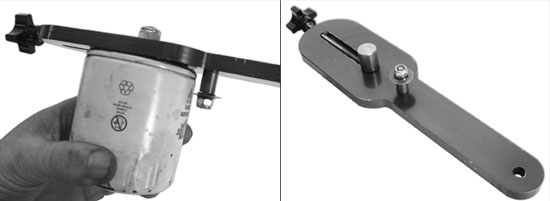
The filter cutter we used is made by Goodson. There are others available that work just as well. They use a carbide wheel kind of like a can opener to cut the outer case of the filter without generating any debris. If you used a hacksaw or a sawzall, you would generate all kinds of debris on the filter making the inspection more difficult. You insert the post into the filter, then tighten the thumbscrew while spinning the filter against the carbide wheel until the can pops off.
Here are some pictures of a filter inspection that took place at a recent Harley-Davidson class taught by ETC, Inc. The student had just gotten his bike back from the dealer where it had gotten a new cam plate, oil pump, cam bearings, tensioners, etc. installed to repair a catastrophic failure. He noticed that they had not changed the filter and thought it was strange, so when he got home, he immediately changed the filter. He brought the old filter with him to class so we could inspect it.
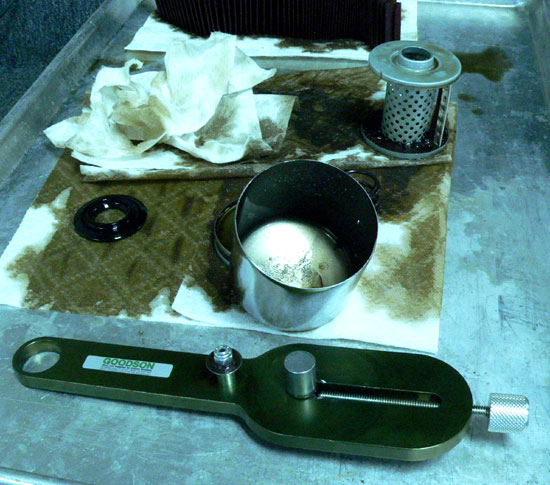
The filter has been cut open and the element cut apart with a razor knife and left to drain on a paper towel.
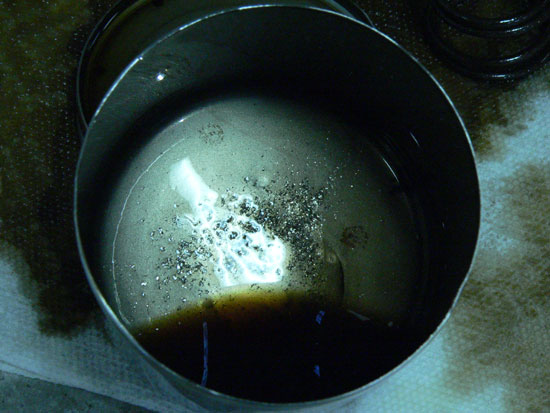
A quick look inside the can reveals the bad news - metal particles in the filter.
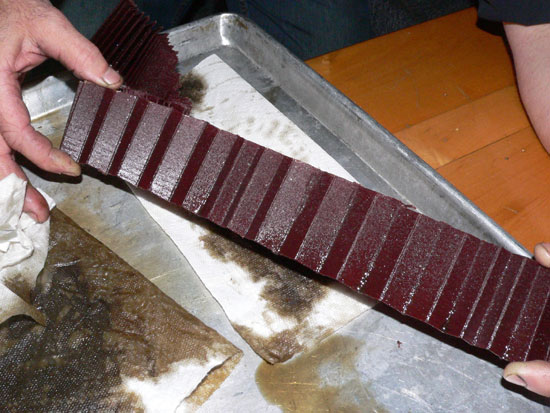
Spreading the element apart like an accordian makes it easier to see what's trapped down in the folds of the filter media.
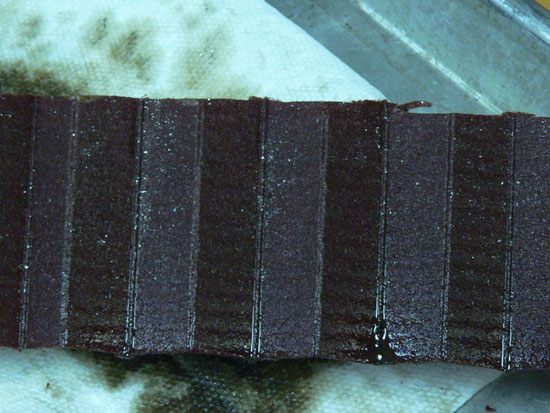
The owner of the bike was not happy when he saw the metal particles in the can and on the filter media. Keep in mind that the oil can bypass the filter on cold startup. In this case, it would send metal particles right into his newly repaired engine. By the time he rode it home from the dealer and changed the filter, the damage was already done. He asked the dealer why they didn't change the filter and they told him that the old filter "still looked good" to them. Huh? Unless you have X-Ray vision, you can't see the condition of the filter from the outside.
He might have benefitted from a screen-type oil filter that comes apart for easy inspection.
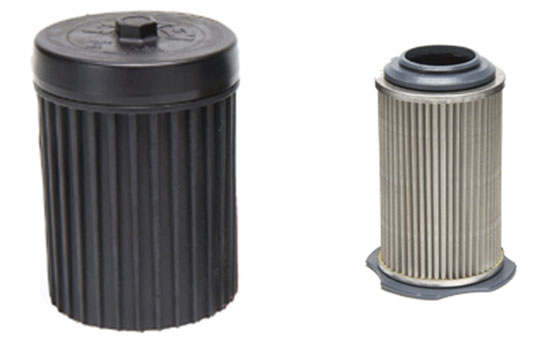
Permanent oil filters such as the one above from System 1 allow you to inspect the filter at any time. They are a little bit pricey, but it's a one time hit. You buy the filter once and it's good forever. Unscrew the end cap and pop the filter media out for inspection. Clean the stainless mesh screen, put it back together and you're good to go.
Tech Tip #2 - Why You Should Consider an Aftermarket Block
Ever wonder what happens if you make too much power in a Ford factory small block? This was a built 302 block destined for installation into a '65 Mustang GT350 R factory racecar. It was on the dyno when a strange noise emanated from the engine. When it happened, the distributor was no longer in time with the engine,so it was thought that the drive pin on the distributor gear had failed. However, the drive pin was found to be intact. Looking down the distributor hole revealed the problem. The block had cracked from top to bottom through all 5 main webs causing the distributor drive gear to disengage from the cam gear, killing the ignition and possibly saving the remaining components. This engine was equipped with a girdle but it wasn't enough to hold the engine together.
This customer will be opting for a new aftermarket Dart block that should never break apart like this. Aftermarket blocks are superior to OEM production blocks in every way. Their only downside is the cost. You should consider using an aftermarket block in your performance project. The only reason to use a production block is because you have to due to numbers matching or original appearance considerations.
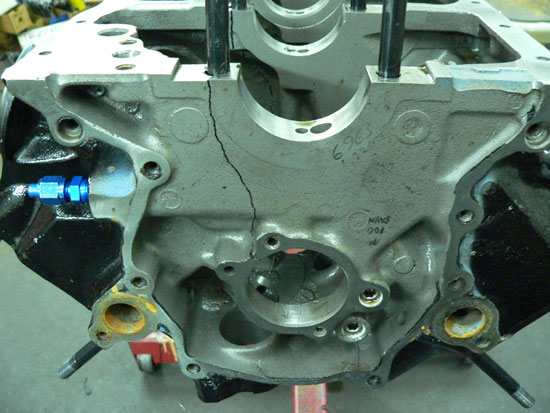
through the cam tunnel to the top of the block.
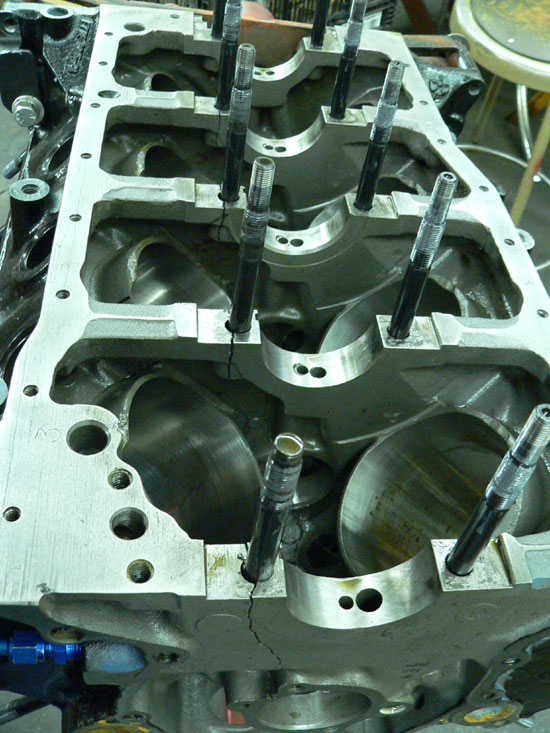
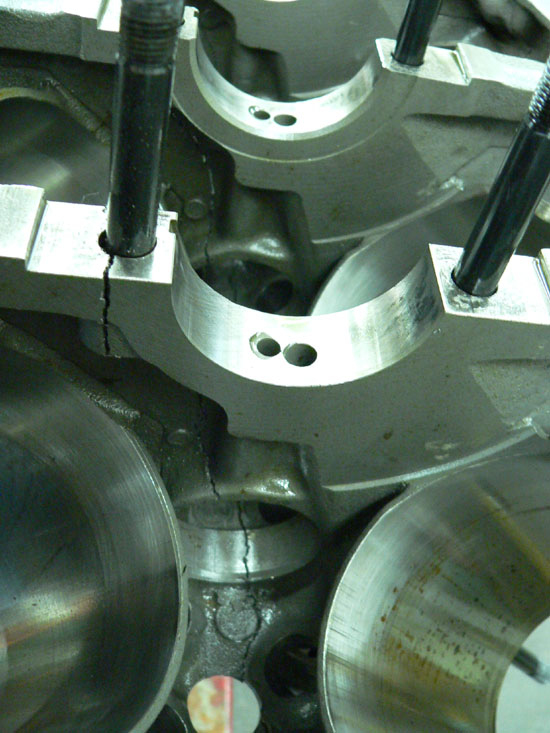
The cam bearings came out with the cam. They lost their press
completely but they didn't spin in their housing bores. Go figure!
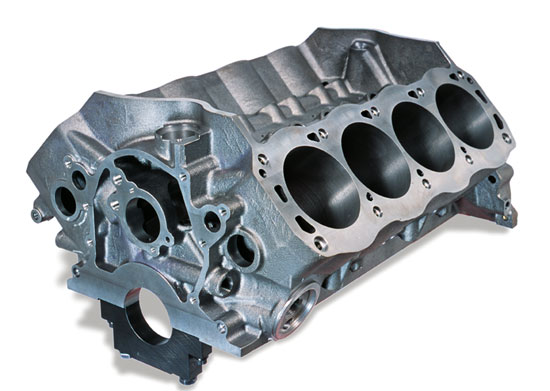
A Dart block like this one will stand up to all the abuse you can dish out and then some. It is superior to the stock block in every way. Don't waste your money on a stock piece unless you have to.
Tech Tip #3 - How A Leakdown Test Can Save You Money
Good ring seal makes power. That's why a cylinder leakdown test is so critical. It tells you whether the machine shop did a good job on both the valves and the cylinder finish. Leakdown testers are available with a single gauge or dual gauges. The dual gauge unit is easier to use. You can buy one for around $100 that has 2 decent gauges. Keep in mind that the cheap 2-gauge leakdown tester (i.e. Harbor Freight) has a second gauge with no numbers on it, just a scale that says Poor - Good - Excellent, etc. Not what you want. By the time you buy the cheap setup then get a couple of good gauges for it, you could already have bought the better tool for the same money or maybe even less.
The dual gauge leakdown tester consists of a regulator and gauge to set the incoming air pressure, a fixed orifice, and a second gauge to indicate the amount of leakage, plus a quick disconnect and hose that you screw into the spark plug hole. The fixed orifice (around .040" diameter) is necessary so the second gauge will be sensitive enough to show the leakage. Obviously a crafty person could make one of these pretty easily. Remember there is always some leakage around the ring gaps, but excessive leakage indicates trouble.
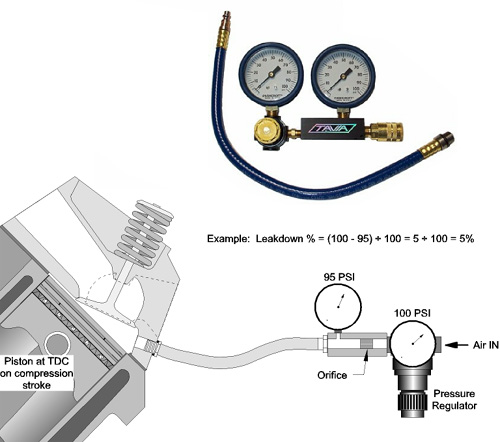
To perform a leakdown test, remove the spark plugs. Put the piston for the cylinder you are testing at Top Dead Center with both valves closed. That way the piston doesn't have any leverage to push the crank into rotation when you put the compressed air to it. Screw the hose into the spark plug hole, and adjust the incoming pressure on the first gauge to 100 PSI. If you miss TDC by a few degrees, the air pressure can turn the engine over unexpectedly, so be careful! Now read the second gauge, and subtract its reading to get the percentage of leakage.
For example, the first gauge reads 100 PSI. The second gauge reads 95 PSI, so the leakage amount is 5 PSI. 5 divided by 100 is 5% leakage. If you don't have 100 PSI available, just measure the leakage PSI and divide it by whatever pressure you have available on the first gauge to get the percentage of leakage.
You wouldn't take an engine apart for 5% or less leakage by the rings. If it's more than 5%, or it's leaking past the valves, you need to investigate. Open the throttle blade on the carburetor or injection system and listen. If you have leakage past the intake valves, it sounds like a tornado. An intake valve leak means the heads have to come off.
Listen at the exhaust pipe for exhaust valve leaks. Exhaust leaks are pretty common on supercharged or turbocharged motors. They eat up the exhaust valves because of the excessive heat they generate. You can live with a little bit of exhaust valve leakage, but you don't want it to get out of control.
If you spot bubbles in the overflow tank, it can indicate a blown head gasket or a cracked block or head. Also listen at the spark plug holes of the adjacent cylinders to the one under test. Air coming out of an adjacent cylinder can point to a bad head gasket.
If you're going to buy a used engine from someone, and you show up on the scene with your oil filter cutter, a spare filter to replace the one you intend to cut apart, and a leakdown tester, you might just save yourself some money.
AMT
Racing Engines -715 South Florissant Road - Ferguson, MO 63135
Phone:
1-(314) 522-6222 - Fax: 1-(314) 522-6347
Copyright © 2011 AMT Racing Engines